Hey, guys. A ton of readers and friends have asked for an update on my underground range. A couple of years ago, I published an article that shared all the details of a 100-yard rifle range that I was building at my new house. I was already under construction, but I also asked my readers for input on how to finish it out. And wow, you guys were helpful! I actually changed quite a bit based on comments from that post. Thanks to all of you who weighed in!
The initial construction was complete, and the tunnel first went into use in December 2022, although I’ve still been working to instrument and outfit it. I like to tinker, so I’ll continue to improve it forever, but I’ll go ahead and share a walk-through of the tunnel as it sits today and briefly share what I’m considering adding in the future.
The original article shared why I was building this, drawings, construction photos, and more. I won’t repeat that content here. I might suggest starting with that article or at least referencing it if you are wondering about something that wasn’t covered. Original Article: https://precisionrifleblog.com/2021/12/27/100-yard-underground-range/
Here is a quick walk-through video:
Now, I’ll walk through a few specifics that I changed since the plans I shared in the original article.
Professional Ventilation Design
There were a lot of comments about the air ventilation in my original post. I felt like I’d read a lot about range ventilation design and had already talked to several experts – but it became apparent that it was a very specialized field. Lead poisoning is a serious health concern for indoor ranges, so I decided to hire Carey’s Small Arms Range Ventilation to fully engineer/design a range ventilation solution for this setup. Carey’s has completed over 1,000 indoor range ventilation systems! They provided complete drawings, specified all of the necessary equipment, and coordinated with my local HVAC installer. They also guaranteed the system would meet all current EPA, OSHA, and NIOSH standards for air quality.
The first design they came up with was extremely complex and would have required that I drop the ceiling height in the shooter’s room from 9 feet down to 7.5’ – which would have dramatically changed the feel of the space. It also required $25,000+ worth of equipment! The airflow that this system was capable of moving was drastically over-engineered for my project, but here are the plans for that original design they provided, in case it’s helpful for others who might be considering a larger space.
I asked the engineer I was working with if he could discuss this project with other engineers to see if there were alternatives. Through some collaboration, the Carey’s team was able to dramatically simplify the design and still accomplish the airflow requirements we were targeting. So here are the plans that I ended up implementing in my underground range: Final HVAC Design & Equipment from Carey’s Small Arms Range Ventilation.

Here are a few keys I learned about range ventilation:
- I initially thought too much airflow couldn’t be a bad thing, right? But, too much airflow often creates air turbulence and backflow of contaminated air – meaning harmful air could end up back by the shooter. What you actually want is “laminar airflow,” which means a smooth and continuous airflow that is very uniform in one direction. That is how ventilation systems are designed to work in labs and surgery rooms. For an indoor range, you want the air to flow from behind the shooter all the way down to the target and then exhaust out – all in a very steady, uniform way.
- To get that steady airflow, you always want to pull air from the target – and not push air from the shooter’s position.
I’m happy with how the ventilation system works today. It turned out that I didn’t need to move near as much air as I had originally planned. There was so little air that we were able to do away with the fresh air intake, and the ventilation system simply pulled conditioned air from my shop that is directly above it. The HVAC units we used to heat/cool my shop were big enough that they’re able to keep up even when the range exhaust fan is on. That was a huge simplification for this whole project.


The exhaust fan is installed directly above the target (shown above) and is perfectly aligned with the tunnel so it doesn’t create turbulent air. The speed of the exhaust fan is adjustable by turning a dial on the wall inside the shooter’s room. I almost always shoot through the 12” x 12” porthole with the blast doors closed, which means I really only need to move around 1 mph of air through that small 1 square foot area and can run the fan at a low speed to achieve that.
There is at least 3 feet of dirt above the roof of the tunnel, and I insulated the shooter and target room – so the temperature stays surprisingly stable in them year-round. However, I can open the blast door to the shooter room and turn the exhaust fan speed all the way up if I ever need to flush out the tunnel to make sure the air temperature is perfectly uniform throughout.
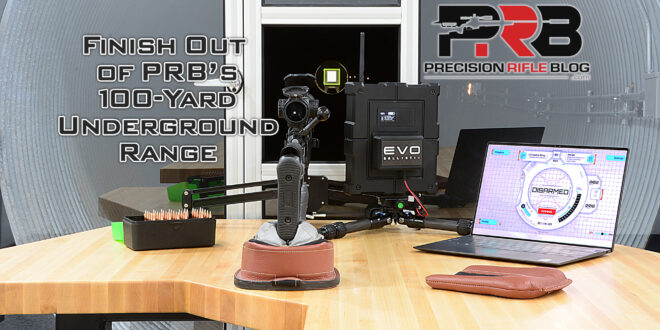
Measuring Velocities: The EVO Ballistix EB-MK ONE

The biggest delay in posting this update on my tunnel was related to finding a reliable and accurate way to record velocities. I was initially hoping that my Lab Radar would be able to record velocities in the tunnel. I was fortunate to get connected with Guy Desbiens, the president of Infinition (the company that makes the Lab Radar and also makes high-end military-grade radars), and he thought it might be a challenge to get the Lab Radar to get readings in my range. He did give me a few tips for how to configure and position the Lab Radar to give it the best shot, and he was genuinely curious to see if it worked. I tested it in the tunnel before we enclosed the basement, and it did give me readings – but once the space was finished out, I tried it again. After trying it in several positions, I found a way I could occasionally get readings, but they were off by 1000 fps. The signal-to-noise ratio in the radar data was simply too high to produce accurate velocities.
I also tried the new Garmin Xero C1 Pro Chronograph in my tunnel, and it also wasn’t able to provide any velocity measurements. I would suspect that the radars may not be able to sort out the signal from the noise, which may be related to the enclosed space and/or the corrugated pipe.
So, the only way I could record bullet velocities in my tunnel for a few months was if I used a MagnetoSpeed v3 Chronograph. I really didn’t like that as my solution because you have to hang that device from the barrel – which impacts barrel harmonics and changes your point of impact. So when you use that device, you can’t shoot groups or check your zero and record velocities at the same time.

My goal is to find a very accurate and reliable way to measure velocities without having to attach anything to the rifle. Guy said that Infinition makes a 35GHz radar, the BR-3503, that would for sure work – but it’s around the $50,000 price point. That’s quite the jump from the consumer-grade devices I’ve been using, so I wanted to explore other options before I went in that direction.
After I published that original article, Marc Erneke from Germany reached out to me and said they were in the early stages of developing a new Doppler radar. I had a Zoom call with them, and they showed me the product and talked through the capabilities. At the time, I was still hoping my Lab Radar might be able to get accurate readings, but once I realized it wouldn’t, I reached back out to them.
Marc was supremely confident that their radar would get accurate readings in my tunnel. In fact, he told me they’d successfully measured velocities in tunnels as narrow as 2 feet in diameter! Their radar doesn’t function like the Lab Radar or other consumer-grade Doppler radars. The use of the constant wave Doppler radar technology allows for dramatically more measurements of the returning radar signal. It also takes most of its measurements within 30 meters of the rifle, meaning there would theoretically be less interference from the tunnel.
So, I ended up purchasing an EVO Ballistix EB-MK ONE Doppler radar, which is made in Germany. This radar is definitely a professional-grade device, and I paid $17,200 for the unit. The EB-MK ONE radar is currently being used by the German military, HK, CZ, and others. It took a few months for me to actually receive the unit since it had to ship from Germany and be imported through US Customs. Once I received it, Marc helped me get it all up and running, and sure enough, we were able to get accurate measurements!

I haven’t used the EB-MK ONE much at this point, so I don’t feel like I can give an honest review of it yet. It does so much more than simply measure velocity. It has a TON of advanced analytics capabilities, including access to the raw radar data, spectral analysis of shot exit events, the ability to build custom drag models, and much more. They even say that because the unit uses constant wave Doppler radar technology and has a high measuring rate, it is even possible to detect even smaller particles along with the bullet, like tiny kernels of unburnt powder leaving the muzzle. The unit takes up to 20 million measurements per second, which means the EB-MK ONE is capable of detecting the slightest changes in the signal, which allows you to analyze the spin and tumble (pitch/yaw) of a bullet.
I hope to get to spend some time exploring the EB-MK ONE advanced capabilities at some point and may do a full review in the future.
Bullet Trap & Target Room

My original plan for a bullet trap was to build a wall of ballistic rubber blocks, like Range Systems Dura-Bloc. I researched lots of options, and in one of those conversations, I got some helpful advice from an industry pro that as those ballistic rubber blocks absorb bullets, they will bloat. After absorbing thousands of rounds, they will become so rounded that the wall would no longer be stable. That makes sense when you think about it. Those are dense rubber blocks to begin with, so those bullets have to increase the size of the block over time.

I still liked the idea of a bullet trap that completely encapsulates the bullet. Traditional indoor bullet traps are usually often just a big pile of pieces of loose rubber. When a bullet hits that, it tumbles and comes apart, exposing the lead core – and lead exposure is a very serious health concern. When an indoor range has to do maintenance on a traditional bullet trap, they typically have to hire a specialty service to do it with Hazmat suits on. I wanted to be able to go downrange to do maintenance or check the target without a high risk of lead exposure.
What I landed on is The Bullet Bunker Goliath 4’ x 4’ bullet trap, which is rated from .22 rimfire up to 375 RUM. I verified with the manufacturer that it could take a 300 Norma Mag and 338 Lapua Mag because those are the largest cartridges I plan to use at this point. I do own a 375 CheyTac and 50 BMG, but I’m pretty sure I’d rather shoot those outdoors than in an enclosed space.


The Bullet Bunker design is kind of a mix between the ballistic rubber blocks and a traditional bullet trap with loose rubber. The unit still fully encapsulates a bullet (meaning no lead exposure in my target room), but inside the box are small pieces of rubber. The bullet trap can take over 10,000 rounds before any service is needed – and potentially a lot more, depending on the calibers and how concentrated the shots are. The hinged collar design makes the maintenance very straightforward. I bought a replacement panel for $300, which might not be needed for 10,000-50,000, and they threw in two 50-pound boxes of ballistic media, which they said should be all I need for at least 50,000 rounds. That sounds like a lifetime!
I bought the base and casters for the Goliath bullet trap, which perfectly centered the bullet trap in my 8-foot diameter tunnel. The green deflector around the outside is 48” x 48”, with the shootable rubber area measuring 42” x 42”. The fully assembled unit weighs over 2,000 lbs. (View drawing with dimensions)

Since the tunnel diameter is larger than the bullet trap, I continued with my original plan to add a 1/2” thick AR500 steel plate on the wall behind it – just in case a bullet ever misses the 4’x4’ green square. I honestly can’t remember a time I was firing at a paper target at 100 yards and missed it by feet – but just in case. On top of the steel plate, I added 20 Range System Dura-Panels. Those are 24” x 24” panels of ballistic rubber that are 2” thick, and I glued them onto the plate with the 3M 550 adhesive that Range Systems recommends. Those panels can absorb and encapsulate bullets and fragments, but they also reduce the echo/sound reflection dramatically.
I did get an extra large 36” x 96” roof hatch in the target room in case I ever want to replace the bullet trap. In fact, we used a crane to lower the Goliath bullet trap through the roof hatch to set it in place, which worked well. The roof hatch serves as a 2nd exit to the tunnel since the tunnel also serves as a tornado shelter for my family and up to 500 friends. 😉 I keep an extension ladder in the target room for such an occasion.
I wanted very flat/even lighting on the target, so I used LED light strips and mounted those around the mouth of the tunnel. They are all connected to specific plugs that can be switched on/off from the shooter’s room. The lights along the inside of the tunnel are also on a dedicated switch in the shooter’s room.

For now, I’ve simply attached a corrugated plastic sheet and paper target directly onto the bullet trap. My plan is to build a free-standing steel target stand in front of the bullet trap, but I haven’t quite decided how the target system will work. I’d like an electronic target system that will display the shots on a screen next to the shooter, and also run analytics on the groups (like average distance to center) and save the target digitally along with meta-data like date, rifle, ammo, etc..

I’ve researched several systems, and it appears that the Kongsberg Target System is the gold standard. It’s used by the US Army Marksmanship Unit, Lapua, and in several of the most prestigious competitions in the world. However, it is not without its flaws. It doesn’t appear to do everything I’m hoping for, and I’ve heard that Lapua isn’t really happy with it. I want the target stand to be able to seamlessly integrate and accommodate whatever electronic target system I end up going with, so I’m just using paper and walking downrange until I settle on the system.
The biggest concern is finding something that works indoors and allows multiple aiming points. If you fire thousands of shots in the very center of a target, you will destroy the center of the bullet trap. Also, since I’m shooting precision rifles into a 42” x 42” shooting area at 100 yards, it only makes sense to use multiple aiming points, similar to all the little aiming dots I have on the target now. Finding a solution that can do that and function in an indoor range may be difficult.
If nothing else, I actually have a degree in Computer Science, and I could use a remote camera to capture the images and write my own software to do the analysis and save the output. I’m hoping not to resort to that. Honestly, using paper targets just isn’t that inconvenient for me at the moment, either.
If you guys know of a good system that might meet my needs, please let me know in the comments!
Blast Doors & Acoustic Panels
I personally designed the blast doors, which are the two doors between the shooter and the tunnel. The idea is that you stick the muzzle through a porthole, and the bulk of the concussion happens in the “expansion chamber,” which is what I call the room between the shooter and tunnel. This is a design that a friend at Accuracy International suggested, and it works amazingly! I think it was a game changer in terms of reducing the concussion the shooter experiences.

The blast doors are made from 80/20 parts, which is like a professional-grade erector set that many labs use for custom fixtures, equipment, custom benches, or other uses. It’s based around T-slot profiles made from aluminum, but they seem to make anything you could dream up! They have all kinds of accessories, like mounting brackets, hinges, the ¼” clear polycarbonate panels I added, door handles, gaskets, and all kinds of stuff. It’s a rabbit hole for an engineer!
What I like about the 80/20 is that it is not only modular but also extremely extensible. I can basically directly mount anything to these doors. If I ever want to directly mount a radar, display monitor, slow motion camera, or other equipment, I could attach those virtually anywhere on these doors – and in a variety of ways.

This was another part I hadn’t ever seen done, so it felt risky – but the doors worked great and were everything I was hoping they’d be. I worked with Shepherd Controls (a partner with 80/20) to figure out exactly what parts and quantities I needed to pull off my design, and then I assembled all of it. Here is an itemized order with all the parts for my blast doors.


I hung two acoustic blankets on each side of the blast chamber room. I sized the room so these 4’ wide x 8’ tall blankets hang freely without touching the floors or walls, but they only had a couple of inches of clearance. I bought AlphaSorb Dual-Sided Absorptive Sound Blanket in 4’x8’ panels from Acoustical Solutions, which is constructed using two layers of 1 in. thick specialized acoustical fiberglass batting and features a durable vinyl-coated fiberglass cloth facing. These blankets have an NRC rating of 0.85, which means they’ve been tested in a lab and shown to absorb 85% of the sound over all frequencies the human ear can hear! If you compare that to other products you typically see in indoor ranges, you’ll see that is ridiculous performance. The vinyl coating is especially nice so that you can easily wipe them down as needed.
I was originally planning to add acoustic panels to the ceiling above the shooter and in the blast chamber, and I also thought I would likely add some on the walls on either side of the shooter. But, after shooting in the space for a while (even with most of the rifles being outfitted with a muzzle brake), I think the blast chamber and acoustic blankets do a surprisingly great job at reducing concussion. Don’t get me wrong – it is still loud when you’re shooting a muzzle brake, but there isn’t much concussion. I may opt to add panels on the walls and ceiling in the future – but I doubt it.
Custom Shooting Bench/Table


I designed a custom shooting bench that I can either sit at or lie down prone on top of. I fabricated and welded the base myself out of thick steel tubing. Most of the steel is 3.5” square tubing that is 3/16” thick. The top is a 2-inch thick, hard maple butcherblock that is 10 feet long and 4 feet wide. The total weight of the table is very close to 900 lbs! The table is sitting on leveling machine casters with retractable anti-vibration pads. I wanted it to be solid and not budge a fraction of an inch under recoil. I nailed that goal! This table is awesome!
The height of the table is 34 inches from the floor to the top of the bench, which is ideal for me. I debated on the bench height for a while! After a bunch of research, it seems like 32-36” bench height is the most common. I actually did all the calculations and design for the bench height before the pipe for the tunnel was even set in the ground, so I dropped the pipe a few inches below the floor of the shooter’s room so that when a rifle with a bipod is on the 34” tall bench, it would be perfectly centered inside the tunnel.
Dropping the tunnel a few inches below the basement floor seemed like a good idea in case it ever flooded, that would help keep the water from going into my basement. The target room is yet another few inches lower than the tunnel, meaning the water would pool in that room. So, if I ever did get water inside it, I could drop a pump in the target room and get all of the water out from that side. Luckily, the thing seems sealed very well because I haven’t got any water in even when it rained for days.
I mentioned that I can lay prone on the table. When I cut out the area for the seated position, I was careful to take it out in one piece. So I can slip that back on the top and have an angle iron under the butcherblock top to support it in the front, and the backrest supports it in the rear. It basically makes it like one large flat table again. I designed it where I could cut out the other side for a left-handed shooter, but for now, they’ll have to go prone. Honestly, this whole underground range is primarily for me to shoot in to do load development, experiments, and check my zero. I don’t plan to invite friends over to shoot in it. I will say that it was an extra long table, so I had plenty of space to spread out prone, but having the extra space at the end gives me a place to set rifles, gear, or I can use it as a workbench without anything being in my way to shoot. I didn’t plan that, but it’s nice!
Here are my plans for the table with dimensions:

How does it feel? What would I change if I did it again?
I honestly had never seen or heard of an underground range that was designed like this, so it felt like I was taking a few significant risks – and I wasn’t sure how they’d turn out. But I’m very happy with the results. I prefer to use muzzle brakes when I compete in rifle matches, and firing a big rifle with a muzzle brake in an enclosed space doesn’t sound great – but it honestly isn’t bad. I think the idea of the porthole through the “blast doors” into the “expansion chamber” was a huge part of that. Thanks to Scott Seigmund for that idea! The specialized acoustic blankets that absorb energy also seem to really help.
I like the size of the space and how everything came together. Virtually all of the underground rifle ranges I’ve heard about have 2’ to 4’ diameter pipe, and the 8’ diameter pipe sure seems to be useful. With that much space, I know for sure that it isn’t affecting the bullet’s flight or adding mirage effects (more on that in the original article).
I’m very glad that I opted for a professional engineering company to design the HVAC. That would have been a place that I would’ve messed up if I hadn’t done that, so thanks to all my readers who chimed in on the first post and educated me.
I do think making the primary bullet trap out of ballistic rubber blocks would have been a mistake, but I’m glad someone educated me before I placed the order. I like the bullet trap I ended up with.
The one surprise I can think of was how expensive it was to get accurate muzzle velocities in the tunnel. I knew it might end up being complex, but I was hopeful I could still use a lower-priced device. However, the professional-grade radar has a lot of advanced features that I hope to get value from at some point.
What experiments should I run?
Okay, in my first post about the tunnel, I asked my readers for ideas on how I could make it better. I’d still be up for hearing any ideas you guys might have. But here is where I’d really like your help:
Now that I have a completely controlled environment where the wind never blows, and the mirage isn’t an issue, what experiments should I run? Please leave your ideas in the comments!
I already have a bunch of ideas I’d like to try as I get time, but I’m interested in hearing what ideas you guys have. I certainly can’t promise that I’ll do them all, but I’d be very interested to listen to all of the ideas!
More Plans & Details
If you are left wondering what I did on something specific, I bet it’s covered in my original article here: https://precisionrifleblog.com/2021/12/27/100-yard-underground-range/


Did you ever consider using an Oehler 35P?
Good question, John. I did think about an Oehler 35P. I was a big fan of that for years, before the MagnetoSpeed and LabRadar came out. If you set it up on a 12’ foot rail with enclosed illumination for sky screens like Bryan Litz did when he tested all the chronographs, it can produce data that seems to as accurate or better than the LabRadar.
And I’m not 100% out on the Oehler 35P. I may still end up doing that if I don’t like the EB-MK ONE … or something different. The downsides with the Oehler 35P is there isn’t a way to digitally save all the data (it’s all analog printout as far as I know). It also would have to be setup in the middle of the tunnel, which is kind of a hassle to walk around. Once I have digital target setup, I shouldn’t need to walk downrange often … so it wouldn’t be a big deal at that point.
But, it’s another good option. Litz’s tests showed it can still compete with these other modern radars, if you do a couple of mods to it – or it might be even more accurate on a long rail. In a dedicated/fixed location like I have, you could leave it setup all the time … which is the biggest drawback of the Oehler 35P. I remember its kind of a pain in the butt to setup!
I have had a few really fun and educational conversations with Ken Oehler over the years. He’s a smart guy and has always been very gracious to answer a lot of questions from an excited young man! 😉
Again, great question, John! I certainly haven’t ruled it out. I’m excited about some of the advanced analytics and features the EB-MK ONE offers, but I’ve yet to determine if “it’s worth it or not.”
Thanks,
Cal
Give Dr. Oehler a call and ask him about his “industrial” systems that use the M57 screens. Much larger shooting area and can be connected to a computer thru the M86 chronograph.
I believe you could even mount them on the sides of your tunnel so that walking downrange would not be a problem.
The M57 screens can be seen in almost any ammunition manufacturing facility and/or test range in the U.S.
Nice job on the test range. I look forward to following your accomplishments.
Hey, Buford. That’s a good idea. I talked to Ken Oehler about this tunnel setup very early on, because I knew he had seen (and even crawled through) so many tunnels over the years to setup his equipment at commercial companies like Sierra, but also defense companies and professional laboratories. I’ll probably reach out to him to learn more about that solution. Thanks for mentioning that other system.
Thanks,
Cal
…was reminded of Lou’s tunnel (I always admired his…until I read this!) and got me wondering what he used to measure velocities in the tunnel—old-school Oehler; sure, it’s not as elegant of a solution as that bad mamma jamma EVO, but a decent Plan C. 🙂
https://www.youtube.com/watch?v=RMIHAUcd_U4
Well done (and well-deserved) tunnel, sir. Very nice!
Hey, John. Thanks for sharing that video. That’s pretty cool.
I do have an old-school Oehler 35P. It’s actually down at the end of my tunnel right now. That would certainly work, I just don’t like the idea of blocking the middle of my tunnel and having to move it every time I want to go down range. I did talk to Ken Oehler a few times about my tunnel and we discussed some of his commercial systems, which are what most indoor test ranges like what Sierra and others have use. Ken told me he has an idea for a little different system that he’s spent some time on which he thought would be perfect for my tunnel. The sensors would mount to the side walls and there would be nothing in the center of the tunnel. If he ever comes out with that system, I’m a buyer. The EVO is a bit of a pain to setup and isn’t as seamless as I was originally hoping. A magnetospeed also works flawlessly in the tunnel, and it’s another very accurate device.
I still want to instrument my target at some point, and have looked at several systems to do that. Once I do that I probably won’t have to walk downrange as often. Honestly, I only do it about once a month now … so it’s not too bad. That 4×4 bullet trap can provide a lot of aiming points!
Thanks for sharing the video and your thoughts! I sure have loved having my tunnel. It will make you very spoiled quickly!
Thanks,
Cal
Dr. Oehler’s System ’89 has been modified to work with an outside velocity source. I use mine with a pair of Garmins.
The ’89 has shown to give much better downrange accuracy than I originally thought, particularly if you setup the microphone array in a square.
I believe the system shown in the video was a Model 43. It required a wire to the downrange sensors. The ’89 is wireless.
Hey, Buford. Interesting. I don’t think the Garmin radars would work in my tunnel (at least they didn’t how I tested it). I did talk to Ken Oehler about this again almost a year ago now (May 2024), after I’d used the EVO for a little while and felt it wasn’t quite as seamless as I’d hoped. His conclusion was, “the System 85 with acoustic target is still the preferred system for your tunnel.” He said the FBI has a range with a big garage door that they open up and shoot downrange, and they built a “carriage” to hold three M57 screens on a 5′ spacings. They use it both indoors and outdoors.
But, then here is the rest of what he said:
Ken said he has good intentions of continued work on the Model 59 screens, but the last few years he’s spent most of his efforts on measuring time-of-flight over extended ranges. But he said he felt like that had been put to bed, so I’m hoping he’d at least have a working prototype that I could purchase at some point. It seems pretty ideal for my tunnel setup, where you can still walk downrange and it would be extremely accurate and reliable.
Buford, I know you’ve worked with a lot of Dr. Oehler’s systems. Have you ever seen the Model 59 screens that he was talking about? You think there is any hope Ken might finish that product one day?
Thanks,
Cal
I know Dr. Oehler is working on the Model 59 screens but I also know they have been busy building the current Model 57 screens and Model 85 systems for the many new businesses getting into ammunition manufacturing.
I think there is hope for the M59s but, in the mean time, the M57’s would do everything you want to do.
I’m familiar with the “carriage” the FBI has…I built it with my guys. You have my contact info. Send me an email and I’ll send you a paper on how we made it.
Brilliant! laminar flow is hard due to the corrugated walls. But as you point out, the flow for your purpose can be very slow.
Hopefully the CW radar will come down in price for the rest of us. Again, the corrugated walls give lots of reflected energy especially due to the (relatively) low frequency of the labradar. Actually, a laser system might be better but I have no idea who might make one.
Our club has installed electronic targets but it may be that they will not have the positional accuracy you need. I will miss wagging the Maggie’s drawers though.
A remarkable achievement, Congratulations.
Thanks, Don. Interesting comment on the laser. This is certainly a niche scenario!
Thanks,
Cal
This is a truly incredible project, congratulations on getting to this point in your dream build. Don’t stop innovating.
Regarding targets, maybe consider a double roller design, just like moving billboards, or a 35mm camera. Two rollers, one is wound with a series of targets with different centers, to prevent shooting out a particular portion of the backstop. The second roller is the “receiver”, and just winds up the used targets. It could be mounted vertically or horizontally, and powered by gears and belt drive, stepper motors, etc., depending on how complex the build is. It could be digitally “numbered” so a camera snaps a pic – to overlay with your targeting software, develop a library, bragging rights, etc. Angle iron over the rollers to deflect wild rounds.
Just tape/glue together a bunch of targets edge to edge yourself, or paste them on a roll of paper, or have a bluprint shop layout something. Into recycling? Use old school, wide format Dot-Matrix printer paper, and the perforated edges provide a giant version of 35mm film, complete with with sprocket feed edges.
OR…. You could use a high definition projector mounted above the shoot tube inside the bullet trap room for digitally deigned targets, projecting onto the same camera film design paper. Think 3D golf range with a rolling replaceable backstop.
Just spitballing ideas here. Looking forward to see what else you add to your shoot lab..
Hey, Matt! We absolutely on the same wavelength! I almost tried to explain that setup in the post, but I thought I might lose some people and the article had already gotten so long. I’m also trying to resist making something like that from scratch. I’m a tinkerer, so I know if I started on that project I’d look up and 6 months would have passed! 😉
I did find a similar target system at SHOT Show 2022, although it wasn’t designed for this purpose. I talked to the manufacturer, and couldn’t convince them to make it work like I was hoping … but I could mod it. I also thought you could use blank white paper and use a HD projector to project the aiming points onto the paper. If you did that, you could “change out” the type of target or spacing of the aiming points digitally from the shooter’s room. After you’d shot them all up, you could flip a switch and the two rolls would rotate and you’d get a fresh clean sheet of paper to project new aiming points onto.
I think if I went that route, I’d have to put a camera downrange and custom write the software to recognize the bullet holes or allow the shooter to mark those points – and then have a way to digitally save images with the groups and stats. At that point, you don’t even need the paper. When you get done with a roll, just throw it in the dumpster. If you saved meta-data of the cartridge, rifle, bullet, and load, you could see stats and patterns over time. It wouldn’t be impossible, but it would take some time to write all the software. I wrote software professionally for 10+ years, so I’m sure I could do it … it’d just be a time commitment. I’d love if I could find a solution that gets me 90% of the way there with way less time. But, you are definitely thinking in the same direction I have been.
Thanks for taking the time to share!
Cal
Thanks for the update! I have been wondering about this project. I work in the trades, and you did a fantastic job putting this together!
I do have an idea for you to test, but it may step on some toes…a little while back, I came across some intriguing scope tests on the rokslide forum; maybe you have already seen it? The guy is not just doing the normal tracking/glass quality tests; he is also putting the optics through a series of small drops while mounted to a rifle. This is to check for a shift in zero. I have been surprised to see some well-regarded brands fail pretty badly-even from something as small as an 18″ drop onto a fairly soft surface.
I feel like he does a pretty thorough job, but there are uncontrolled variables, plus he is just some guy on a forum. After reading through a few of his tests/results, I thought to myself, “That guy from Precision Rifle Blog should do a test like this!”
Anyway, I know its probably a long shot, but if you are interested I can send you a link. If nothing else, you might enjoy seeing what he’s tested so far.
I have learned so much from your articles over the years. I’d like to say thanks for putting out quality content. I’ll be looking forward to all the data coming out of your tunnel!
That is a great idea, Mike. It has been almost 10 years since I did my big scope test. This indoor range would ABSOLUTELY make doing a test like that take way less time. It would sure be fun to redo that test with all the popular scopes today that have been released since then. And I like the idea of an impact test. I was hesitant to do that when I did that first test, because some of the scopes weren’t mine. But, I think as long as I told the manufacturers I was doing that beforehand, that is a great thing to test. I even came up with some ways you could control for the impact force and make it very repeatable, which is a big part to make the data objective and comparable.
Thanks again, Mike! Even the fact that you thought of me when reading someone else’s test is a huge compliment.
Thanks,
Cal
Could you do an experiment to prove if you need to adjust for the sun. Perhaps with a bright light @ 0°, 90°, 180° and 270° next to your bullet trap?
Kind regards, love the website!
Oh my gosh, John! That is such a great test! I’m not sure how I could control for that in my tunnel, but I heard a friend from Vortex talk about doing that probably 10-12 years ago … and it’s intrigued me ever since. I think what he originally told me was that he wanted to set up a camera in a fixed location that did time-lapsed photos from dawn to dusk of the same target. I think if you did those photos through a scope or some kind of optic with a reticle in it, that would allow you to see any shift in optical position from mirage or other effects. I’m not sure how I could recreate or control for that in my tunnel though. It seems like you’d want to do that outdoors with the sun.
I would suspect you could measure a difference in some scenarios, and I’d bet how much a target moves would vary based on environmental conditions and target distance. But, it would be VERY interesting to be able to somehow quantify those differences. I really have no idea how much that might change through the day.
You’ve certainly got me thinking. That would be a great experiment, even if it wasn’t in the tunnel. I wonder how much that shift might be purely from the position of the sun alone. 0.1 mils? 0.3 mils in some extreme scenario? Maybe more?
Thanks for sharing the idea!
Cal
My vote for an experiment to run is to attempt to recreate the results on barrel tuning shown in this article: http://www.geoffrey-kolbe.com/articles/rimfire_accuracy/tuning_a_barrel.htm
A lot has been written about barrel harmonics but this is the only study I’ve seen with data. Having a singular study is always problematic though. Maybe someday I’ll have the time and equipment to investigate myself.
I could just be undereducated, so if you know of other places with data please enlighten me. 😉
Hey, Jacob. Thanks for sharing. Hearing that, I know you’d love Modern Advancements for Long Range Shooting Volume III. That book was published in 2022 and Bryan Litz and the guys at Applied Ballistics did extremely thorough and professional testing on barrel tuners, and in Volume II of that same series those guys do a crazy amount of live-fire testing on what people often refer to as “positive compensation” or “group convergence.”
All of the Modern Advancements for Long Range Shooting books have a data-driven, MythBusters-style approach with serious science behind them. They do a lot of research and development for the military, but also do experiments and publish those for the civilian market as a way to give back to the shooting community. I can guarantee that you’d love those books. I’ve literally read shelves of books related to rifle shooting, and those are my favorite. They are cutting-edge research and hard data from carefully instrumented live-fire experiments. It doesn’t get better than that! 😉
Thanks,
Cal
I may have missed it, but in the room you fire from, do you have sound/energy absorbing panels on the ceiling? I’d shoot at a range where the firing positions have overhead cover that’s angled so that (unfortunately) much of the energy displaced upwards when using a muzzle brake is then reflected back down at the shooter. Even with adequate hearing protection the concussion when firing my 308 or 338 gives me a headache. Long term effects are probably not great, so I’ve dropped the muzzle break when shooting on that range,
Hey, Allan. It was a long article, but I did mention that at some point. Here is what I said about that:
I even bought the sound insulation material and framing material for the acoustic panels, because I just assumed I was going to add those. But, it just hasn’t been a high priority to install them, because with ear protection on … the concussion isn’t bad at all in the shooter room, in my opinion. I have fired multiple magnum rifles with muzzle brakes in there for 20+ shots in a short period of time, and didn’t have the slightest headache or discomfort.
I think the “blast chamber” idea with the 2 acoustic blankets on either side kind of act like a suppressor. They basically allow the high pressure gases to expand in that area, and then they are released back through the porthole or down the tunnel at a slower rate. By spreading the energy of the concussion over time, it drastically reduces the peak energy and perceived concussion. That’s at least my theory!
I also think hanging the blankets where they can move helps a lot, compared to having a fixed panel on the wall. The blankets are fairly heavy (14.4 lbs each), so when the concussion hits them the material itself not only absorbs energy … but the concussion moves the blankets slightly and I think that absorbs additional energy as well.
I could always take off the brake when I’m shooting in the tunnel, but since I primarily compete with rifles that have muzzle brakes on them … that would erode the value of the tunnel to me. Ideally, I’d be able to shoot my rifles without any modifications in the tunnel, and I really feel like I can already.
I may add those panels at some point and be surprised by how much they help, but at this point I just haven’t made it a priority. I was headed in that direction, but the acoustic blankets just seem to do such a great job.
Thanks,
Cal
Wow! Well done, Cal!
Thanks, John-Kyle! It has been a crazy project!
Thanks,
Cal
I would like to see you shoot through two targets with a 300 yard zero. The first target being zeroed at about 22-25 yards as it crosses up over the line of sight and the second target (100yrd) to see how it lines up with calculated rise.
The second thing I would like to see is a thousand yard zero, shot at a hundred yards.
Interesting, Tim. What do you think you’d see at 100 yards? It seems you’d just be changing the point of aim in the optic to be higher with the 300 yard zero and then even higher with the 1000 yard zero … but I can’t think of how that would impact the bullet flight. Would you mind sharing a little more about what you’re wondering about there?
Thanks,
Cal
Hey Cal! While I was in my Washington DC tour of duty, I got to visit the NAVSEA ship hull testing pond. It’s a mile long and I still haven’t figured out how they did that but they did and now they test miniature ship’s hulls.
Maybe you could stretch out your 100yd tunnel out to a mile? 🤓😬😳🤯🙌👏
Ha! Thanks, David. I’m not sure I have the budget for that. 😉
Thanks,
Cal
Cal,
Thanks for the info and great thinking on this. The work you have done on your project will provide endless ideas for others to apply in the ranges they shoot on. Thanks for the thoughts and quick reply.
Al
That’s what I was hoping, Allan. That’s why I wanted to publish all the details on how I went about it, what I considered, and why I landed on what I did. There certainly isn’t much info out there on a setup like this, and I’ve honestly had several people tell me they were considering building something very similar and they had specific questions. So I figured sharing my detailed plans might be helpful for the next guy, even if they were doing something a little different. Just trying to be helpful!
Thanks,
Cal
Cal
WOW!!! As I deal the effect of wind trying to evaluate loads, bullets, etc. —- I can think of soooo many things it would be fun to test. I have often wondered just how precise one could be with a 5 or 10 shot group in conditions like you have. It would also be fun to test samples from cases of high end .22. AND — is my .30BR really better than by 6BR if I rule out bullet diameter?
Enjoy! You deserve the fun!
Ken
I agree, Ken. I’ve even thought about adding a rail gun that I could mount on the table to completely eliminate the human element, too. I have looked at a rail gun contraption made by Bill Wiseman that you could mount any Remington 700 barreled action to, which seems like it’d be pretty ideal for the types of rifles that I’m most interested in. Most of my rifles are based on a Rem 700 footprint. I’m sure there will be a lot of stuff like that I will add over time as I do projects that would benefit from them.
Thanks,
Cal
There are some apps on the iPhone App Store that may/may not help you with scoring your targets. I have played around with them a little (not an expert) but they seem to need one of many types “standard” competition targets out there or Eley’s uses their own proprietary target.
Not ideal for me as I make my own targets, but they might work for you. Cheap to try out.
Blackhole
Eley-X Shot
TargetScan
(Here is the link for the last one’s supported targets. It’s darn hard to find! https://targetshootingapp.com/wiki/Supported_disciplines/)
Thanks!
Hi Cal:
I am just plain jealous !!!! What a great set up.
You put a lot of thought and your experience into making something special that can truly benefit future shooters with all the experiments and tests you will now be able to do.
I want to copy your custom shooting bench. The idea of one shooting bench for both sitting and prone shooting is an excellent idea.
I have always liked my a MagnetoSpeed Chronograph and glad it worked for you even if you did need something better for your test.
With your completely controlled environment in the tunnel your future test on just how accurate our rifles and scopes are in tunnel compared to above ground will help with future purchases.
But whatever you test in the future I am sure we will find interesting .
Thanks
Paul Goggan
Canada
Thanks, Paul. Glad you liked the bench design. I’m trying to share everything, just in case it’d help anyone. I was in a niche scenario with the shooting bench. Lots of people would just lay on the ground to shoot prone, but I need the rifle to be in the middle of the tunnel regardless of whether I’m seated or prone. But like I said, I love the table design!
And the MagnetoSpeed is such a great device. It never misses a shot, which is not true of many other chronographs. It also doesn’t ever get confused or record the wrong shot if you’re on a range with other shooters. And it’s just so compact, too. Lots to love there!
Thanks for the encouragement! I certainly have no shortage of ideas or dreams for it. I’ve been thinking about it and working on it so long, it’s kind of surreal that it’s done.
Thanks,
Cal
Hi Cal,
Congratulations on an immensely impressive project. We as readers have all benefited from your research and tests. Many more to come. Just a bummer on the velocity measurement systems.
sincerely
Thanks, Mare! I’m just glad I found something that works. It was certainly more expensive than I was thinking, but there is a lot of promise in their advances analysis features. For example, if I am able to detect the bullet’s pitch/yaw out of the barrel or how much unburnt gun powder comes out of the muzzle, that seems like it could help in load development or give new insights that we could learn from.
Thanks for taking the time to share the encouragement.
Thanks,
Cal
Absolutely legendary, it looks like the Houston warehouse for our generation. I can’t wait to see the exciting things that come from this tunnel.
I would love to see an experiment testing the effect of powder residue on dispersion. If you shoot groups with two powders where one powder gives good groups and the other gives bad groups, then repeat the test, but clean the barrel between each shot. If the group sizes converge, then it’s an indication that powders giving better accuracy has a lot to do with bore condition due to the way the powder burns.
Hey, Adam! “The Houston Warehouse for our generation” … love it!
That would be very interesting test. Variations in how different powders foul the bore is one of those subtle influences that I’d suspect does have some impact on precision, but would likely be easily lost in the noise of factors that you can’t control for outdoors. I hadn’t thought of that one at all, so I’ll add it to my running list.
Thanks,
Cal
I would have my physician obtain lead & heavy metal panel [if lead not on the panel] prior to initial shooting and then every three or four months for the first year if shooting regularly in the tunnel. Is a nuisance; however, prudence dictates precaution.
If all levels remain pretest, would still do annually or biannually.
Aim High, Good Shooting.
That’s a great point, Richard. I’m totally with you. I talked to my doctor about that recently, and I literally have orders for a blood draw at a lab waiting on me to swing by and do it. Thanks for the reminder though … because it’s been waiting for over a month now. 😉
When I was first dreaming all this up I had a conversation with a firearm manufacturer who tests all their weapons in a tunnel, and their technicians that fire the weapons do blood tests once per month. At one point the tests did show elevated lead in their blood. It wasn’t impacting their health yet, but it could have if they allowed it to continue. They adopted new cleaning procedures and their levels went back to normal levels.
I’ve heard that lead poisoning can be difficult to diagnose, and is often mis-diagnosed … so I figured I should at least test myself early on here.
Thanks,
Cal
Very good, I’m pleased you already thought about that. I would do a heavy metal screen as well adding: Arsenic, Cadmium, Chromium, Lead [which you’re scheduled for] & Mercury.
Years ago, I read a medical report of outdoor shooters, especially cast bullet shooters, developing higher lead levels which I thought impossible. It is not impossible. I always wondered about my father who was a cast bullet shooter, casting and fluxing in our little gas range in the house basement. He died with a strange depression and renal problems among other things.
Regarding data capture and display, see
https://www.oakwoodcontrols.com/electronic-target-systems/portable-electronic-target-system/
and
https://www.oakwoodcontrols.com/electronic-target-systems/quality-assurance-system/
Thanks, Oscar!
Be aware that testing something like group size vs. a barrel tuner setting requires firing a lot of shots at each setting to achieve meaningful statistical precision. Probably impractical.
For example if 5×5-shot groups are fired at each setting (25 shots) the standard deviation of the average group size will be about 10%. Differences in the 5×5 average size should be 20% or more for a meaningful (2-sigma) result. That’s 25 shots per tuner setting. Holding everything else constant over such a large number of shots will be difficult.
Shooting just one group at a lot of different settings will be a waste of time and ammo unless the tuning effect is large. The SD of single 5-shot group sizes is about 25%. Two groups must be more than 50% different to claim significance. If such a difference is seen the test should be repeated to know it is not just a statistical outlier.
It would be useful to have a rail gun to eliminate shooter error. And record data vs. round count since the precision will change as the barrel fouls or heats up.
Thanks, Gary. You are right. You might find my series of articles that I named “Statistics for Shooters” interesting. I’d say it was the hardest thing I’ve ever tried to write about, but I’m really happy with how it ended up. https://precisionrifleblog.com/2020/11/29/statistics-for-shooters/
I’ve definitely considered a rail gun, and even priced one out that allows you to use any Remington 700 barreled action. I’ve used gun vises in the past, and even with remote hydraulic triggers, I couldn’t get them to shoot as tight of groups as what I could behind the gun from a bench. I’d assume that wouldn’t be the case with the rail gun, but it at least made me hesitant to believe a rail gun would clearly remove noise from the data.
Honestly, I wish I knew someone who had done serious research both ways and could speak to that. I know the Applied Ballistics team does a ton of serious research, but virtually never use a rail gun. Maybe I’ll run into someone at some point who has practical experience with that. I’m hesitant to make the investment without hearing someone who has real-world experience saying it really does add a lot of value. I get that it does in theory, but I wonder what it does in practice.
Thanks for the thoughtful comments! I realize that some of the things I might test would require a lot of rounds. I did a barrel test once that included 2,000+ rounds of testing. I’m not afraid of the big numbers if I feel like it’ll lead to new insight. I do think the tunnel eliminates some noise from the data already, so whatever you’d have to fire outdoors you’d likely save at least a few shots in the tunnel to get to the same level of statistical significance.
Thanks,
Cal
Yes, yours is a good article. I gained understanding of group size statistics by doing a Monte Carlo simulation.This can also be obtained from shooting data like Bryan has been doing, but a lot of shooting must be done. Hopefully he does more such studies.
A friend made a rail gun, and it definitely will shoot more precisely than we can for low round counts. But I don’t know of anyone who has tested for thousands of shots. A rail gun will not get tired like a single shooter would. But I don’t know if the rail gun itself is stable over long periods.
Anyway tests involving hundreds or thousands of shots have other problems such as barrel fouling, erosion, etc.
Ii find it useful to track quantities like shot location and velocity, together with the environment, barrel temp, etc. vs. round count to study things like coldbore/cleanbore effects, velocity migration, barrel break-in, etc. For this the electronic target and a DAQ which can gather the data sources into an event structure would be nice. The best group size is one. Record the hit position in order for every shot, then analyze many shots, I can’t do this but instead track group size, centroid, and velocity vs round count. Working on the accuracy side of the accuracy/precision problem.
For example, rifles have a window of consistent performance. After cleaning they require fouling for group size and velocity to stabilize, and then after many shots (how many?)) the groups start to open up or velocities creep up unacceptably. Moly coating bullets might be expected to extend the consistent period. Does it and if so by how much?
Great research and design Cal. As usual your attention to detail and data driven approach shines through. I have dreams of an underground tunnel range on my property someday. You’ve shared a huge head start if I ever make it a reality.
Congrats on an excellent job.
Lee
Thanks, Lee!
Wow! Sickest thing I’ve seen. I remember your custom rifle project when I started with PRS, talk about taking things to another level!
Thanks, Kristoffer! It still feels unreal that I actually did this. It’s a crazy idea for sure!
Thanks,
Cal
Have you taken a look at the ShotMarker system from MacDonald? It seems to have support for many different target layouts and it looks like the owners could potentially work with you to add more targets to their library.
Hey, Clayton. I did talk to Adam MacDonald to get his thoughts on how the system would work in a tunnel environment, and he was VERY optimistic that it would work really well. Here is what he told me:
The Kongsberg Target System seems like another good option that is used by a few serious competitions and labs, although its not without its flaws.
Honestly, I just haven’t spent the time trying to figure out which one I should use. I was making a big push this year to become a pro shooter in the PRS, which I am happy to say that I accomplished! It took a ton of practice and work to get there, so that took up virtually all of my free time until very recently. I’m leaning towards the ShotMarker, and I’ll be honest … it’s at least partially because I think very highly of Adam and we seem to be pretty aligned in how we think about statistics and shooting. I also feel like he’d be open to feedback, where Kongsberg is really just a faceless corporation to me. Being able to talk to the guy that makes something has value beyond the system’s features.
Thanks,
Cal
It’s so cool to get this thoughtful and detailed response from you, Cal. I’m staying tuned to all of your future content, and I will be rooting for you on the pro circuit!! As if PRB wasn’t cool enough!